RSPCA Education - Lessons and Activity Library - Education

Build ladybirds a home
Create a safe and warm home for ladybirds, whether in your garden or in a community space.
Last edited: 11/04/2024
Before you get started
Items you may need
- Small logs
- Drill
- Saw
- Pine cones
- Straw
- Twigs
- Planks of wood or other repurposed materials to create a shelter
Remember young people should always be supervised when using tools.
Instructions
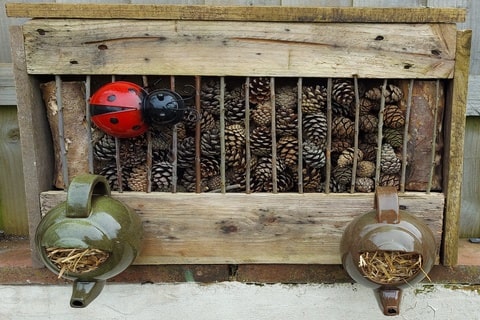
Creating a home for ladybirds
Drill holes to form a log hide
Drill a number of holes in a log, with each hole pointing in a different direction. Ladybirds will make their way into the depths of the log to stay safe.
You could place the logs into a larger shelter, or use the drilled logs as standalone homes.

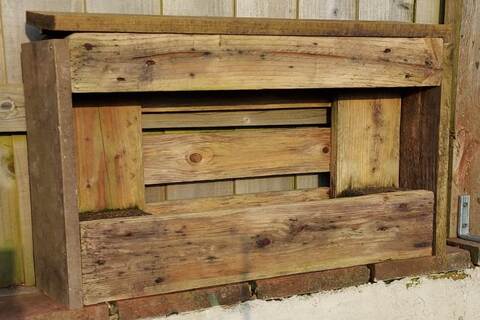
Create a shelter
Find materials to use as a frame and roof to keep the ladybird home protected from the weather.
Materials could include:
- Repurposed wood pallets
- Spare ceramic tiles
- Unused household items
Be creative – but make sure the shelter is safe.
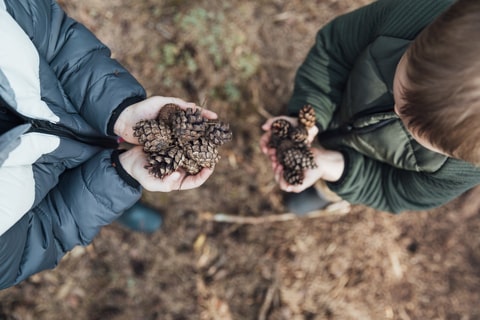
Fill the shelter with ‘bedding’
Fill your shelter with a variety of bedding to give ladybirds a choice.
We advise:
- Pinecones (Tip: dry your pinecones to open them up)
- Straw
- Twigs
Ladybirds will want to feel safe in a small protected space.
Receive your certificate
Upload a photograph of your ladybird home below and receive your certificate.
Share your work to inspire others and celebrate what you’ve achieved!
Get a practical animal welfare certificate!
If you’ve just completed this activity, upload a photo and get your own animal environment certificate!
Upload image